Features & Specs
If you’re running memberships with ARMember and want a fast way to take payments worldwide, the Skrill Gateway fits right in. No messy workarounds, no third-party dashboards to babysit—just turn it on in ARMember and charge members through Skrill. And yes, this is the 100% original GPL licensed addon: the real file, safe and legal, update-ready, with zero cracks or nulled risks.
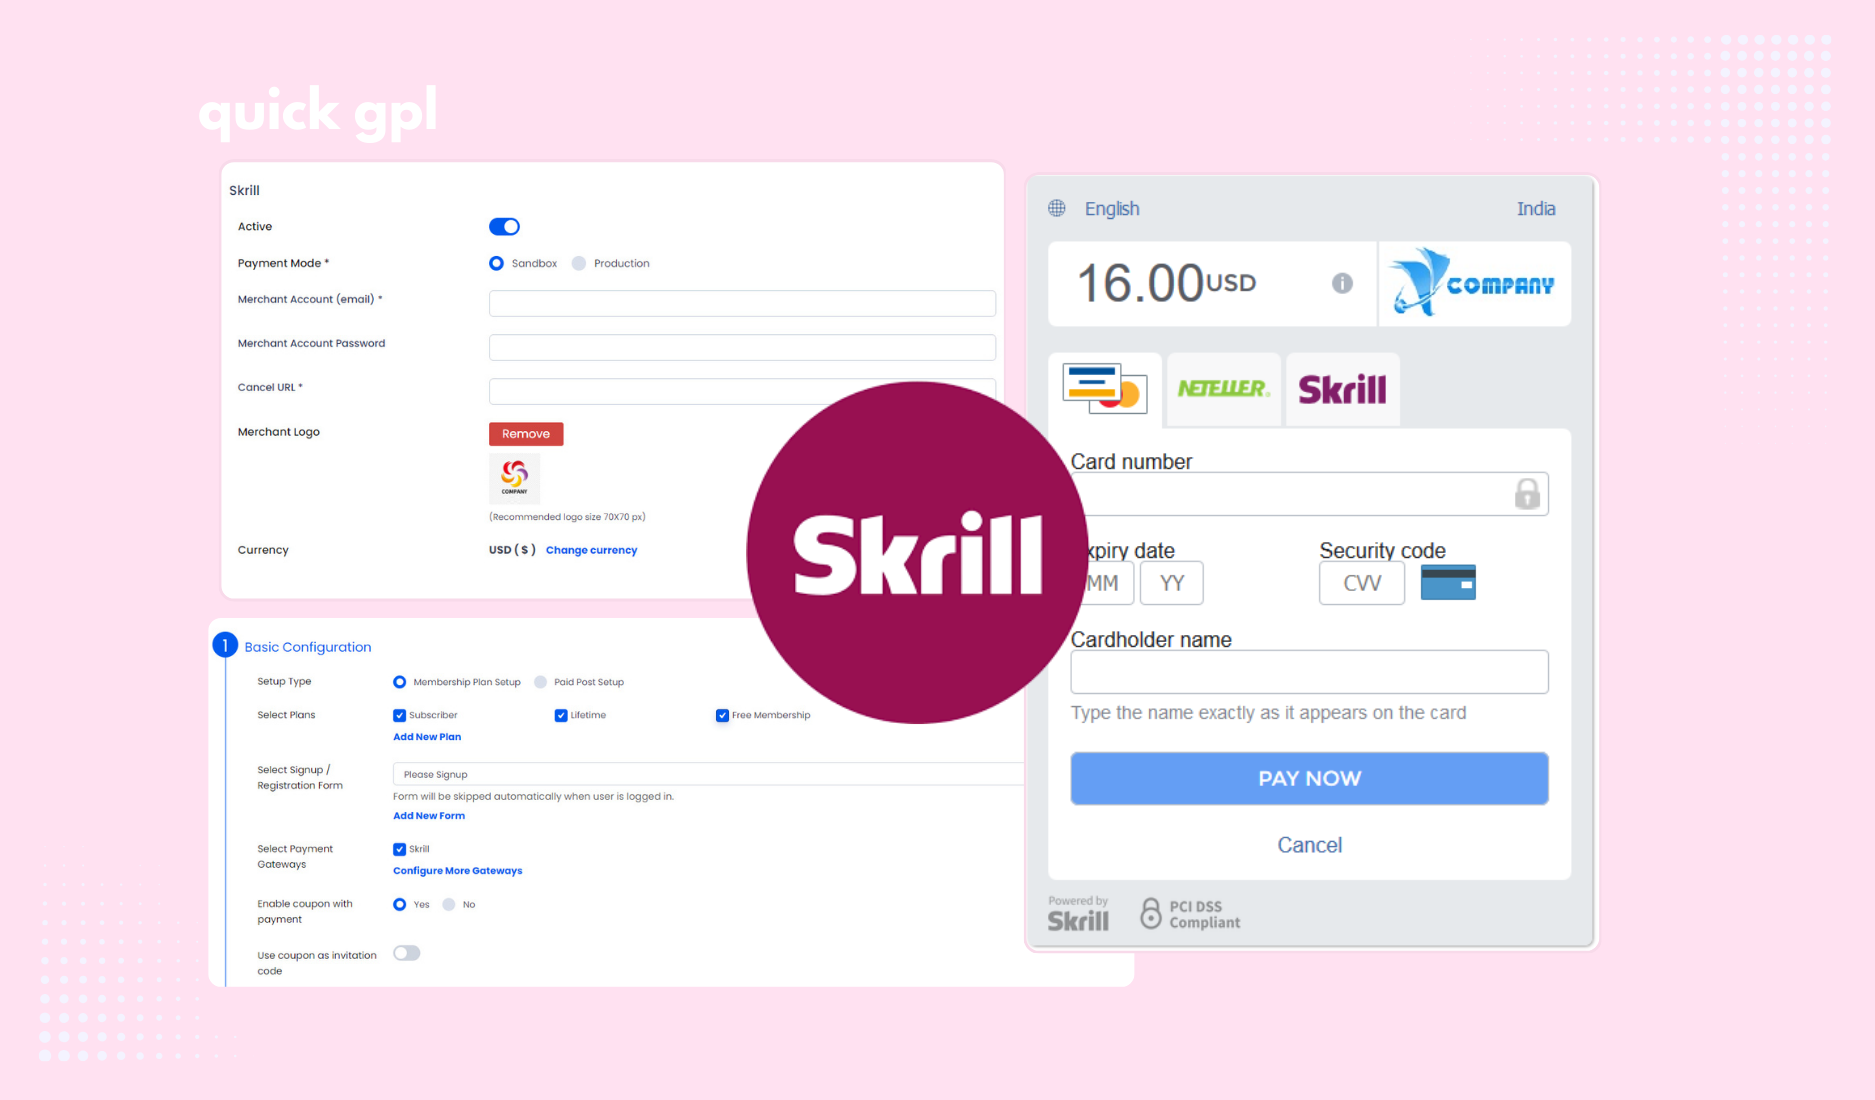
You install it like any other ARMember addon. After activation, jump into your ARMember settings, pick Payment Options, and enable Skrill. Add your Skrill account details (the merchant email / API info you already use for payments), save the settings, and you’re basically good to go. Plans you’ve already created in ARMember will now show Skrill at checkout, so members can pay without friction.
What you’ll notice day one is the checkout feels familiar—clean, quick, and built for conversions. Skrill is popular for international buyers, digital wallets, and local methods in many regions, which helps reduce failed payments and abandoned carts. ARMember handles the membership logic (plans, trial periods, access rules), while Skrill takes care of the payment flow. You keep your WordPress speed and your SEO intact.
How do I set up ARMember with Skrill quickly?
Open ARMember → Settings → Payment Options, enable Skrill, paste your merchant credentials, choose your currency, and hit save. Make a small test purchase to confirm success and return URLs are working as expected.
Quick Setup Guide for ARMember Skrill Addon:
Here’s the easy and detailed way to setup ARMember Skrill integration so that you don’t have to waste hours digging through menus.
-
Activate the Addon
Go to ARMember → Add-ons, turn on Skrill, then head over to General Settings → Payment Gateways.
-
Add Skrill Credentials
Use your Skrill Merchant Email and API/MQI Password. If you don’t have the API password yet, log in to Skrill → Settings → Developer Settings, create it, and save.
-
Logo & HTTPS
Skrill lets you show your logo at checkout. Just upload it in settings, but make sure your site runs on HTTPS, or it won’t display.
-
Connect to Your Plans
After saving, Skrill shows up in the Plan + Signup Page. Toggle it on for whichever plans you want.
-
Supported Payments
Works with one-time and subscription payments, across 30+ currencies (USD, EUR, GBP, INR, etc.). Keep in mind:
-
No free trial support on auto-debit.
-
Coupons only apply to the first recurring payment.
-
Daily recurring billing is limited to 1-day cycles.
-
Testing Before Live
Skrill gives demo merchants + test cards (Visa, Mastercard, Amex). Use those to check your setup before going live.
Tip: run a test checkout after setup, exclude checkout pages from caching, and double-check currency matches in Skrill + ARMember. That small check saves headaches later. Still facing problem to setup? Then check this official setup guide of ARMember Skrill Payment Gateway addon.
Would Skrill work with my existing ARMember plans?
Yes—once Skrill is enabled, it appears at checkout alongside your other gateways. You don’t need to rebuild plans; just toggle Skrill on and test.
Is ARMember Skrill GPL version safe for updates?
It is. You’re getting the original GPL build, which means secure, legal, update-ready—no cracked or nulled files that risk your site or data.
If your membership site needs a payment option that plays nicely with international customers and keeps things simple for you, this addon is an easy win. Enable it, test it, and let ARMember handle access while Skrill processes payments smoothly in the background.


